Y'all know I love a good home-cooked meal, something that simmers all day or bakes slow in the oven, filling my Texas kitchen with delicious aromas. But let's be real, sometimes a girl just needs a little something sweet, and she needs it *now*. That's where this incredible microwave mug cookie recipe bursts onto the scene, saving the day one delightful bite at a time.
I remember those nights after a long day of wrangling kids and managing the ranch, when a full baking session felt like climbing Mount Everest. My sweet tooth, however, was not willing to compromise. Necessity truly is the mother of invention, and that's how this quick and easy treat became a beloved staple in my household. It is a true game-changer for those spontaneous dessert cravings.
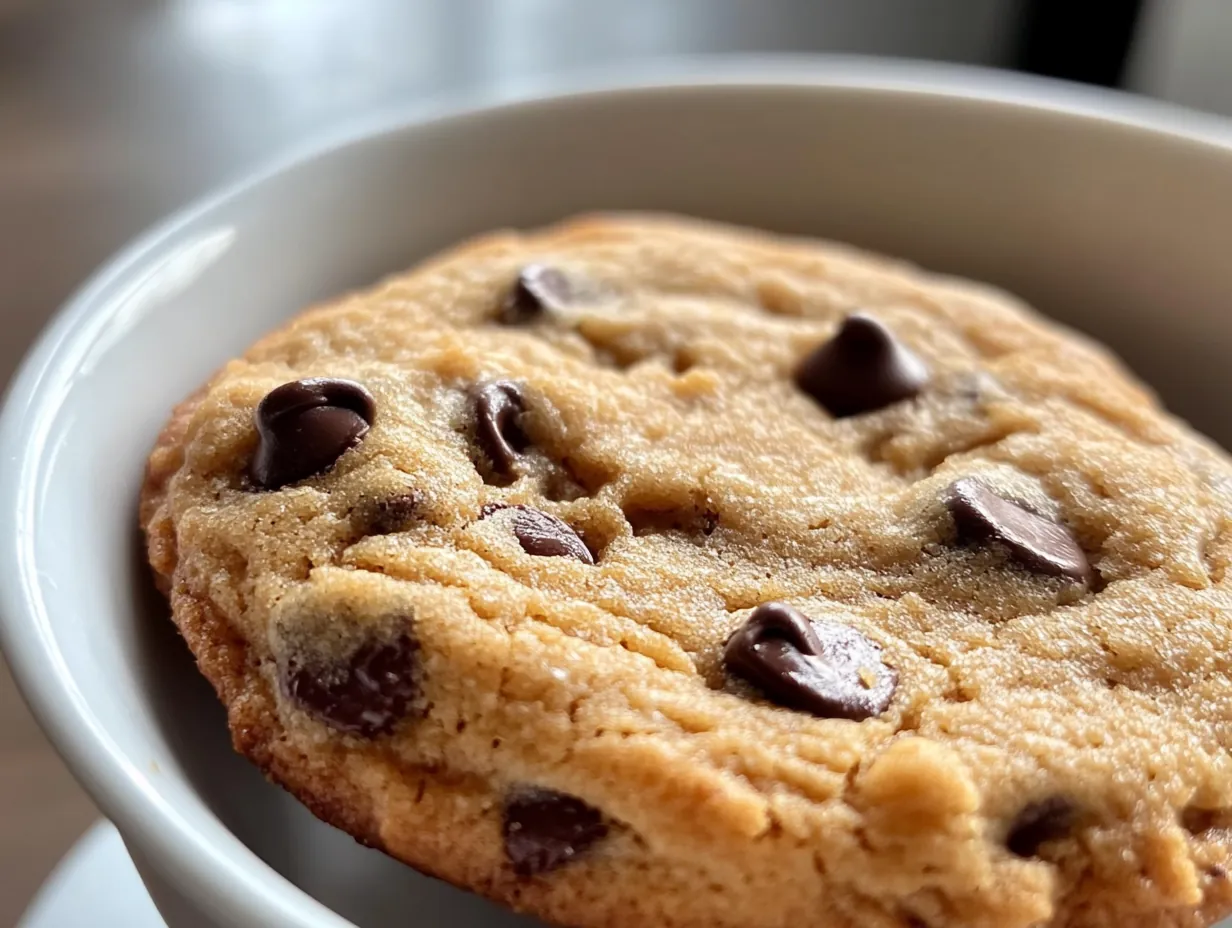
This microwave mug cookie isn't just fast; it's a little hug in a cup. It is perfectly portioned for one, meaning no leftover temptation. Plus, it uses ingredients you already have in your pantry. It is about bringing that instant joy and comfort without any fuss or a sink full of dishes. Trust me, once you try this, you will wonder how you ever lived without it.
So, grab your favorite mug, gather a few simple items, and let's make some magic. This recipe is a testament to deliciousness found in simplicity. It proves that even the quickest treats can deliver big on flavor and warmth. Get ready to indulge in pure, unadulterated cookie bliss!
Gathering Your Sweet Mug Cookie Ingredients
Before we dive into creating this instant delight, let's make sure we have all the essentials ready. These are simple pantry staples, making this recipe incredibly convenient for those sudden cookie urges.
- 2 tablespoons unsalted butter, melted
- 2 tablespoons granulated sugar
- 2 tablespoons light brown sugar, packed
- 1/4 teaspoon vanilla extract
- Pinch of salt
- 1 large egg yolk (reserve the white for another use!)
- 1/4 cup all-purpose flour
- 1/8 teaspoon baking soda
- 2 tablespoons chocolate chips, plus more for topping
Key Ingredient Insights for Your Best Mug Cookie
All-Purpose Flour: This is the backbone of our cookie, providing structure and chewiness. For the best results, spoon your flour into the measuring cup and level it off. Scooping directly from the bag can compact it, adding too much flour and leading to a dry cookie. If you need a gluten-free option, a 1:1 gluten-free baking blend works well here. Ensure it contains xanthan gum for proper texture.
Light Brown Sugar: This ingredient is crucial for a chewy, moist cookie. Brown sugar contains molasses, which adds moisture and a rich, caramelized flavor. Always make sure it is firmly packed into your measuring spoon. If you are out, you can substitute it with granulated sugar, but add a tiny bit of molasses or honey for some moisture and depth. Alternatively, half a tablespoon of maple syrup can also work in a pinch.
Chocolate Chips: These little morsels provide bursts of melty chocolate goodness in every bite. I prefer semi-sweet chocolate chips, but milk chocolate or dark chocolate work wonderfully too. Feel free to mix it up! For a fun twist, you can swap them for white chocolate chips, chopped nuts, or even M&M's. Just remember to use good quality chips for the best melt and flavor.
Baking Your Perfect Microwave Mug Cookie
Alright, sweet friends, let's get this cookie party started! Follow these simple steps for a warm, gooey treat in no time.
-
Grab your favorite microwave-safe mug. Ensure it is at least 12 ounces to prevent any overflow during cooking. Melt the butter directly in your mug by microwaving it for about 15-20 seconds.
Chef's Tip: Using a microwave-safe mug from the start saves you an extra dish. Watch the butter carefully to avoid splattering or burning. It should be fully melted but not browned. -
Add the granulated sugar, light brown sugar, vanilla extract, and salt to the melted butter in the mug. Stir these ingredients together thoroughly with a small spoon or fork until they are fully combined and creamy. This creates the sweet base for our cookie.
Chef's Tip: Proper mixing here helps dissolve the sugars, contributing to a smoother, more evenly textured cookie. Make sure there are no lumps of sugar remaining before moving on to the next step. -
Stir in the egg yolk. Mix until it is completely incorporated into the sugar and butter mixture. The mixture should look cohesive and slightly thickened.
Chef's Tip: The egg yolk adds richness, moisture, and helps bind the cookie together. Do not use a whole egg; the extra egg white can make your cookie rubbery in the microwave. -
Add the all-purpose flour and baking soda to the wet ingredients in the mug. Mix gently until just combined. Be careful not to overmix the batter at this stage.
Chef's Tip: Overmixing flour develops gluten, which can lead to a tough cookie. Mix only until you see no dry streaks of flour. A few small lumps are perfectly fine and often preferred. -
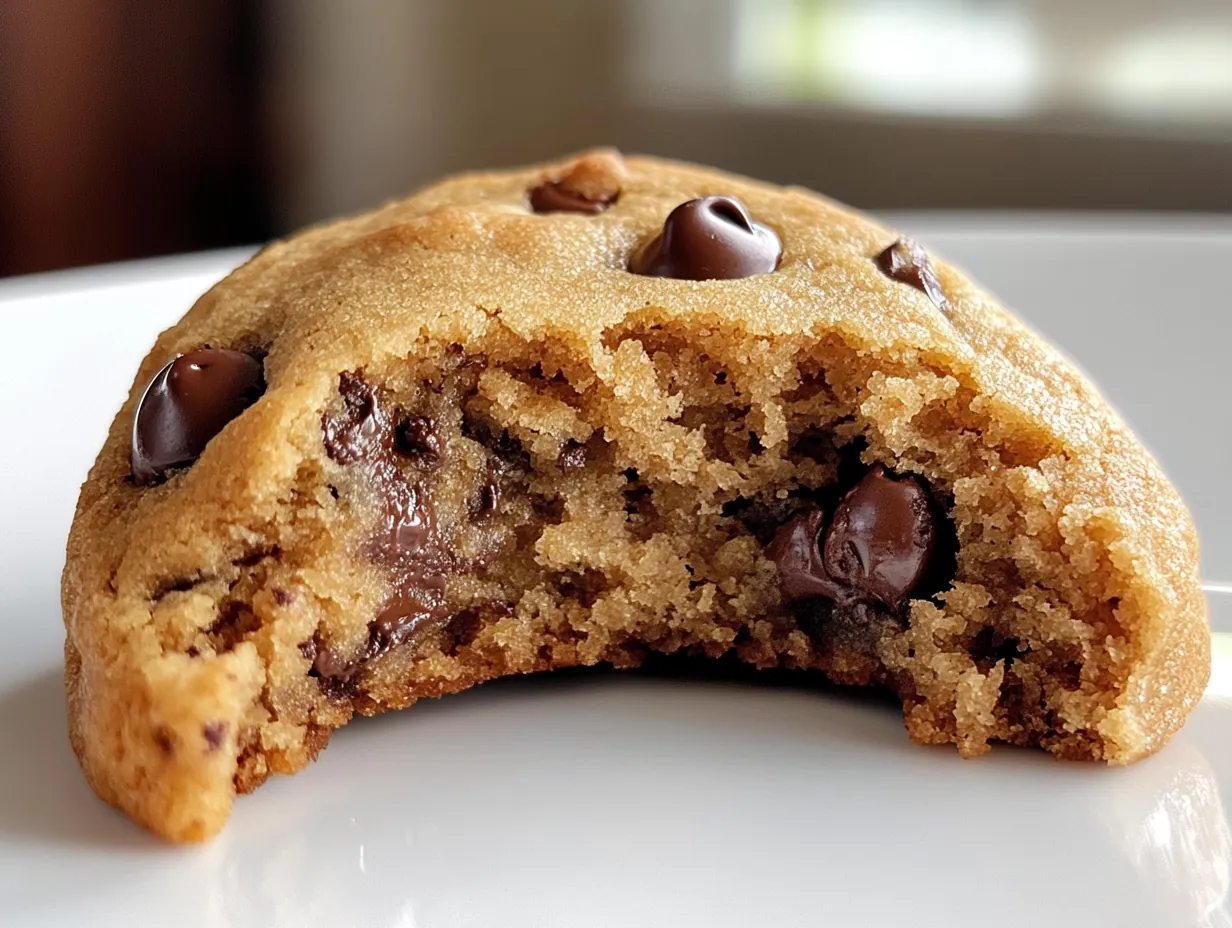
Fold in the chocolate chips. Stir them in evenly throughout the batter. You can add a few extra chips on top for a prettier finish, if you like.
Chef's Tip: Reserve a few chocolate chips to press onto the top of the cookie before microwaving. This makes for a more appealing presentation and promises melty chocolate right on top. -
Microwave the mug cookie. Cook it on high for 60-90 seconds. Cooking times vary wildly based on your microwave's wattage, so start with 60 seconds and check for doneness.
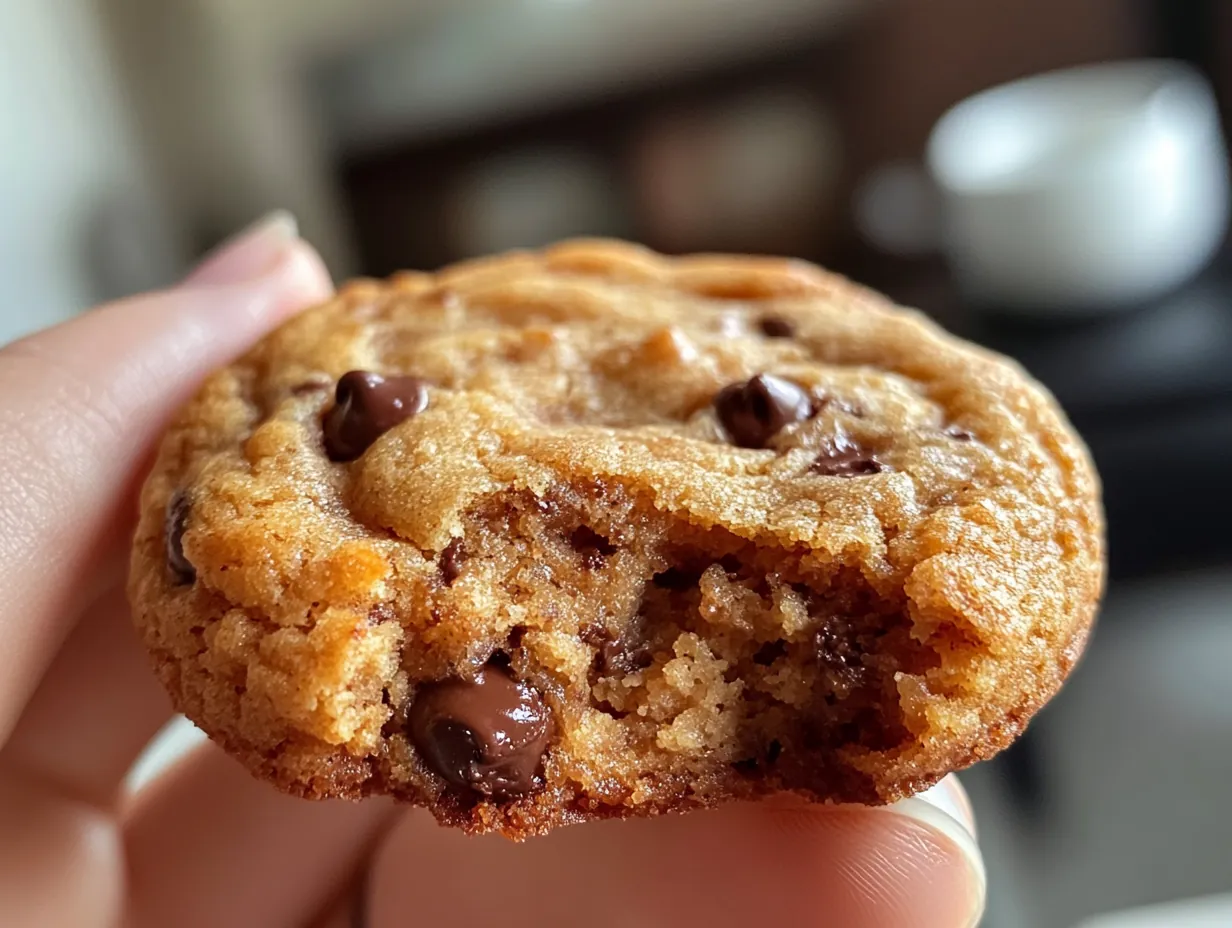
Chef's Tip: The cookie is done when the edges look set and the center still looks slightly gooey but not raw. It will continue to cook slightly as it cools. An undercooked cookie is better than an overcooked, dry one. -
Carefully remove the mug from the microwave. The mug will be hot. Let the cookie cool in the mug for at least 1-2 minutes before digging in. This cooling period allows the cookie to set up properly.
Chef's Tip: Resting is essential for the cookie to firm up and for the flavors to meld. If you try to eat it too soon, it might be too soft and fall apart. A minute or two makes all the difference for texture.
Creative Twists for Your Mug Cookie
The beauty of a mug cookie is how incredibly adaptable it is. Once you master the basic recipe, the possibilities for customization are truly endless. Let your imagination run wild and transform this simple treat into something uniquely yours.
My Creative Touch:
-
Peanut Butter Swirl: For all my peanut butter lovers, this one is for you! After folding in your chocolate chips, drop a spoonful of creamy peanut butter onto the top of the batter. Use a toothpick or the tip of a knife to gently swirl the peanut butter into the cookie dough before microwaving. It adds a delightful nutty richness.
-
S'mores Style Cookie: Bring the campfire indoors with this fun twist. After the cookie has cooked for about 45 seconds, remove the mug from the microwave. Top the partially cooked cookie with a few mini marshmallows and a sprinkle of crushed graham cracker crumbs. Return it to the microwave for another 15-30 seconds, or until the marshmallows are puffed and slightly golden. It is pure gooey magic.
Gourmet Pairings:
-
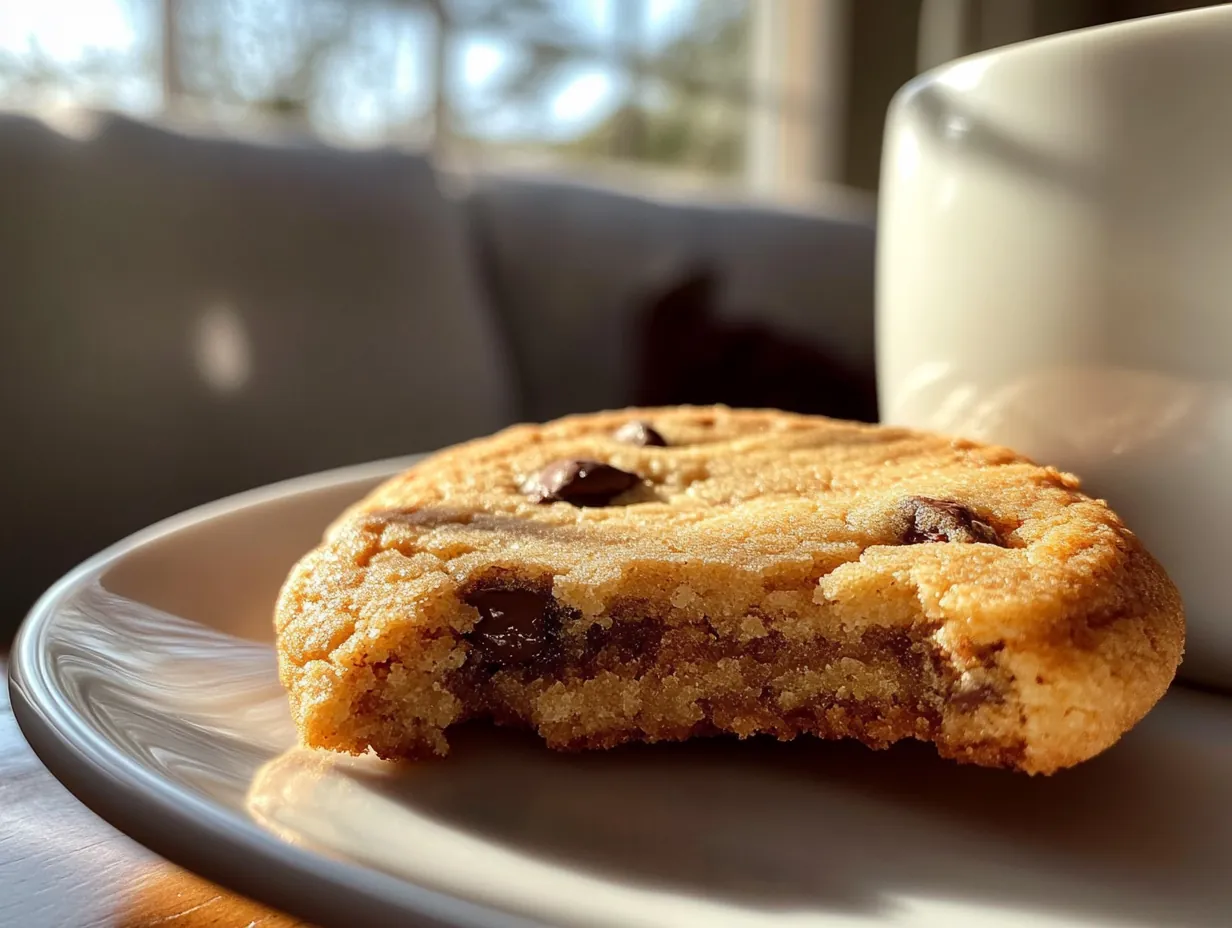
Drink Pairing: A cold glass of whole milk is the classic, unbeatable companion for any warm cookie. The cool, creamy milk perfectly balances the rich sweetness of the cookie. If you prefer something warm, a freshly brewed cup of coffee or a comforting mug of hot cocoa also makes an excellent match.
-
Side Dish Pairing: While this mug cookie is a complete dessert on its own, a small scoop of vanilla bean ice cream takes it straight to heaven. The cold, melting ice cream against the warm, gooey cookie is an irresistible combination of temperatures and textures. A dollop of whipped cream is another fantastic, light option.
Storing Your Delicious Mug Cookie
While this mug cookie is truly best enjoyed fresh and warm, there are a few smart ways to handle leftovers or prepare ahead.
Storage: A fully cooked mug cookie, when stored in the fridge, tends to dry out quickly and loses its desirable gooey texture. It is truly designed for immediate consumption. However, if you have to save it, cover the mug tightly with plastic wrap and refrigerate for up to 1 day. Be aware the texture will change significantly.
Freezing: The best way to prepare this cookie ahead is to make the dough and freeze it. Prepare the cookie dough as directed in the instructions, but do not microwave it. Cover the mug tightly with plastic wrap or transfer the dough to an airtight container. It can be frozen for up to 1 month. When you are ready for a cookie, simply thaw the dough in the fridge for a few hours, then microwave as usual.
Reheating: If you must reheat a previously cooked cookie, a quick zap in the microwave for 10-15 seconds can warm it through. However, be very careful not to overcook it, as this will make it tough and dry. Adding a tiny splash of milk over the top before reheating can sometimes help retain a bit of moisture. For frozen dough, thaw completely before microwaving.
Microwave Mug Cookie Questions Answered
Got questions about whipping up this quick and easy mug cookie? I have got you covered! Here are some common inquiries to help you master this delicious, speedy dessert.
Can I make this mug cookie ahead of time?
Yes, you can definitely prepare the dough ahead of time! Simply mix all the ingredients in your mug as instructed, up to the point of microwaving. Cover the mug tightly with plastic wrap and refrigerate it for up to 24 hours. When you are ready for your cookie, just pop it straight into the microwave. This is a great trick for quick dessert prep.
Why is my mug cookie dry or rubbery?
A dry or rubbery mug cookie is almost always a sign of overcooking. Microwave ovens vary significantly in power, so finding the perfect cooking time takes a little trial and error. Start with the minimum recommended time (around 60 seconds) and check for doneness. The center should still look slightly gooey. Too much flour can also contribute to dryness, so ensure you are measuring accurately.
Can I make this recipe without an egg yolk?
Absolutely! If you need to skip the egg yolk, you have a couple of good options. You can use 1/2 tablespoon of unsweetened applesauce or a 'flax egg' substitute (1 teaspoon ground flaxseed mixed with 3 teaspoons water, let it sit for 5 minutes). These alternatives will still help bind the cookie and add moisture, though the texture might be slightly different. They work wonderfully for dietary needs.
Well, bless your heart, if you have made it this far, you are just moments away from enjoying one of life's simplest and most satisfying pleasures. This microwave mug cookie is more than just a recipe; it's a little secret weapon for instant comfort. It is proof that you do not need a fancy kitchen or hours of free time to create something truly delicious and soul-satisfying.
I hope this recipe brings a little bit of that Texas-sized warmth and ease into your home. It is perfect for those late-night cravings, a quick after-dinner treat, or simply because you deserve a moment of pure, unadulterated sweetness. Do not fret if your first one isn't absolutely perfect; that is the beauty of home cooking. Every attempt is a step closer to your own personal perfection.
So go on, treat yourself! And when you do, I would love to hear all about it. Share your mug cookie creations and any fun twists you tried over on TastyDishClub.com. There is nothing I love more than seeing y'all get creative in the kitchen. Happy baking, my friends!
Reader Reviews
Such a comforting and satisfying dish. I followed the recipe to the letter and the results were amazing. 10 out of 10!
Love how approachable this recipe is. First time I ever nailed this dish and the tips really made a difference!
Made this last night and my family absolutely loved it! The flavors were perfectly balanced. Will definitely be making this again very soon.
Beautiful recipe! I added a little extra seasoning and it was perfect. The whole house smelled amazing.
Tried this for the first time and it was a huge hit. The prep time was accurate and it smelled incredible while cooking.
Leave a Review